上一章React Native实战教程请查看:React Native列表ListView
在本章中,我们将向你展示如何在React Native中使用TextInput文本输入元素。
Home组件将导入和渲染输入。
App.js
import React from 'react';
import Inputs from './inputs.js';

const App = () => {
  return <Inputs />;
};
export default App;
文本输入TestInput
我们将定义初始状态。
定义初始状态之后,我们将创建handleEmail和handlePassword函数,这些函数用于更新状态。
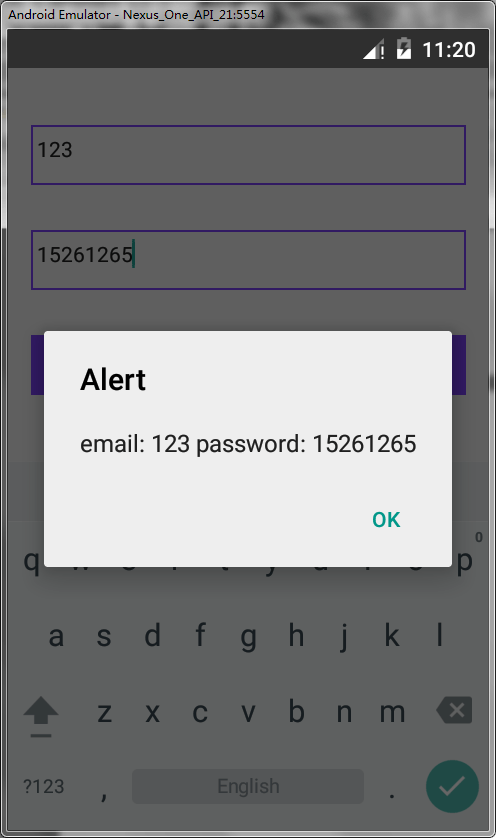
login()函数将仅提示状态的当前值。
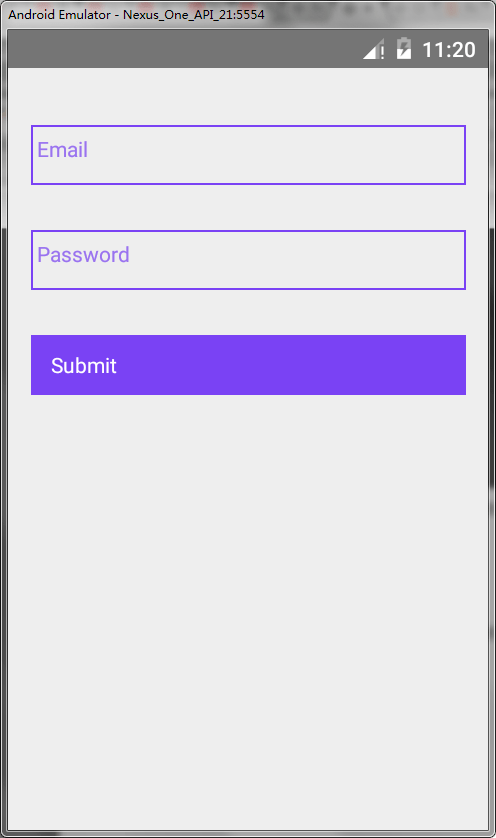
我们还将向文本输入添加一些其他属性来禁用自动填充,删除Android设备的底部边框并设置占位符。
inputs.js
import React, {Component} from 'react';
import {
  View,
  Text,
  TouchableOpacity,
  TextInput,
  StyleSheet,
} from 'react-native';

class Inputs extends Component {
  state = {
    email: '',
    password: '',
  };
  handleEmail = text => {
    this.setState({email: text});
  };
  handlePassword = text => {
    this.setState({password: text});
  };
  login = (email, pass) => {
    alert('email: ' + email + ' password: ' + pass);
  };
  render() {
    return (
      <View style={styles.container}>
        <TextInput
          style={styles.input}
          underlineColorAndroid="transparent"
          placeholder="Email"
          placeholderTextColor="#9a73ef"
          autoCapitalize="none"
          onChangeText={this.handleEmail}
        />

        <TextInput
          style={styles.input}
          underlineColorAndroid="transparent"
          placeholder="Password"
          placeholderTextColor="#9a73ef"
          autoCapitalize="none"
          onChangeText={this.handlePassword}
        />

        <TouchableOpacity
          style={styles.submitButton}
          onPress={() => this.login(this.state.email, this.state.password)}>
          <Text style={styles.submitButtonText}> Submit </Text>
        </TouchableOpacity>
      </View>
    );
  }
}
export default Inputs;

const styles = StyleSheet.create({
  container: {
    paddingTop: 23,
  },
  input: {
    margin: 15,
    height: 40,
    borderColor: '#7a42f4',
    borderWidth: 1,
  },
  submitButton: {
    backgroundColor: '#7a42f4',
    padding: 10,
    margin: 15,
    height: 40,
  },
  submitButtonText: {
    color: 'white',
  },
});
每当我们输入一个输入字段时,状态都会更新。当我们单击Submit按钮时,来自输入的文本将显示在对话框中。

每当我们输入一个输入字段时,状态都会更新。当我们单击Submit按钮时,来自输入的文本将显示在对话框中。

 srcmini
评论前必须登录!
注册