Kivy是Python中与平台无关的GUI工具。由于它可以在Android, IOS, Linux和Windows等操作系统上运行。它基本上是用于开发Android应用程序, 但这并不意味着它不能在桌面应用程序上使用。
??Kivy教程–通过示例学习Kivy。
UX小部件
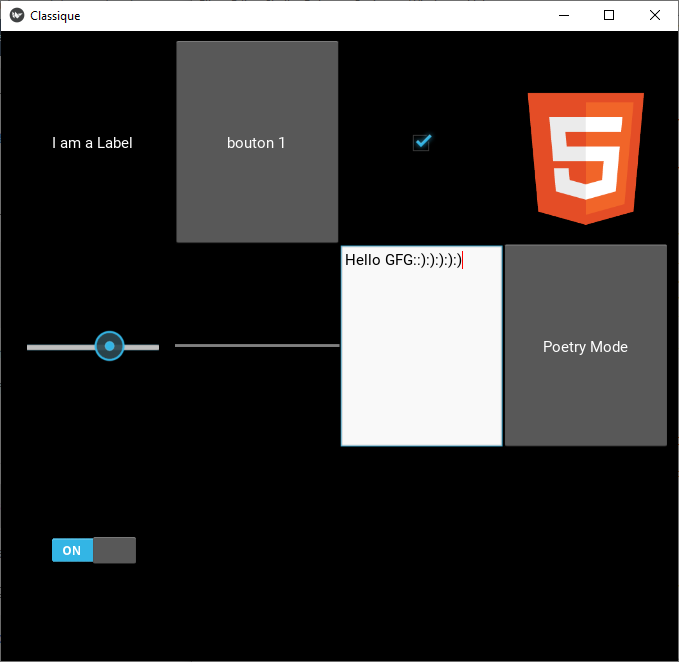
经典的用户界面小部件, 可随时组装以创建更复杂的小部件。有多个UX小部件, 例如标签, 按钮, 复选框, 图像, 滑块, 进度条, 文本输入, 切换按钮, 开关。
- 标签:”标签”小部件用于呈现文本。它支持ascii和unicode字符串。
- 按键:按钮是带有相关操作的标签, 该操作在按下按钮时触发(或在单击/触摸后释放)。
- 复选框:CheckBox是一个特定的两种状态按钮, 可以选中或取消选中。
- 图片:图像小部件用于显示图像。
- 滑杆:Slider小部件看起来像一个滚动条。它支持水平和垂直方向, 最小/最大值和默认值。
- 进度条:ProgressBar小部件用于可视化某些任务的进度。
- TextInput:TextInput小部件提供了一个可编辑纯文本框。
- 切换按钮:ToggleButton小部件的作用类似于复选框。当你触摸或单击它时, 状态会在”正常”和”按下”之间切换(与按下该按钮时仅”按下”的按钮相对)。
- 开关:开关小部件处于活动状态或非活动状态, 例如机械灯开关。
在这里, 我们将使用几乎所有这些UX小部件, 以便你可以了解如何在单个代码中使用它们。
Basic Approach:
1) import kivy
2) import kivyApp
3) import window
4) Set minimum version(optional)
5) Create the App class
6) Create the .kv file
7) Make the run method/run the App
该方法的实施:
.py文件:
# Program to Show how to use multiple UX widget

# import kivy module
import kivy

# base Class of your App inherits from the App class.
# app:always refers to the instance of your application
from kivy.app import App

# this restrict the kivy version i.e
# below this kivy version you cannot
# use the app or software
kivy.require( '1.9.0' )

# Here for providing colour to the background
from kivy.core.window import Window

# Setting the window size
Window.size = ( 1120 , 630 )

# Add the App class
class ClassiqueApp(App):
     def build(FloatLayout):
         pass

# Run the App
if __name__ = = '__main__' :
     ClassiqueApp().run()
.kv文件:
# .kv file implementation of the App

# Using Grid layout
GridLayout:

     cols: 4
     rows: 3
     padding: 10

     # Adding label
     Label:
         text: "I am a Label"

     # Add Button
     Button:
         text: "bouton 1"

     # Add CheckBox
     CheckBox:
         active: True

     # Add Image
     Image:
         source: 'html.png'

     # Add Slider
     Slider:
         min : - 100
         max : 100
         value: 25

     # Add progress Bar
     ProgressBar:
         min : 50
         max : 100

     # Add TextInput
     TextInput:
         text: "Enter the text"

     # Add toggle Button
     ToggleButton:
         text: " Poetry Mode "

     # Add Switch
     Switch:
         active: True
输出如下:

首先, 你的面试准备可通过以下方式增强你的数据结构概念:Python DS课程。
 srcmini
评论前必须登录!
注册