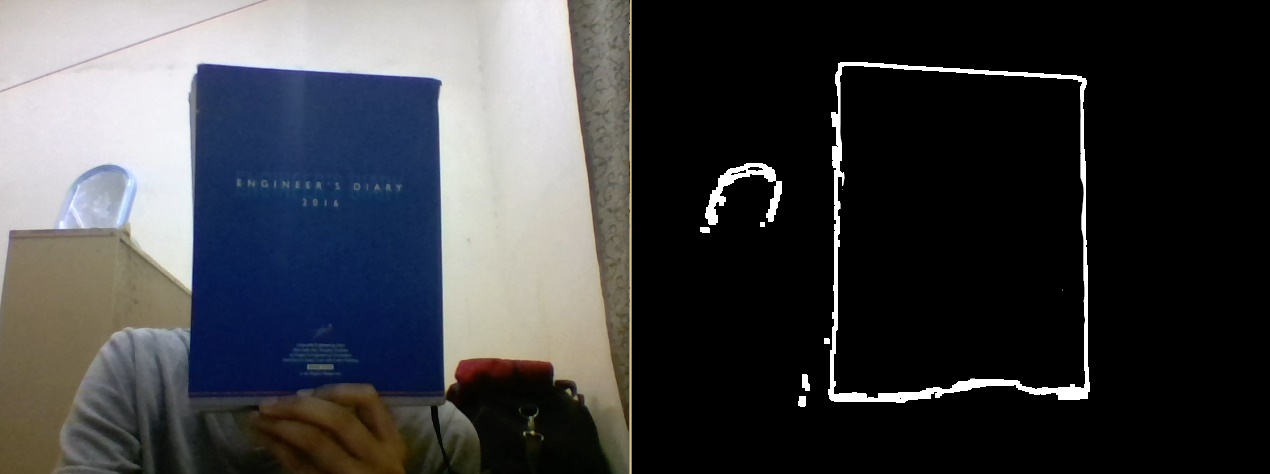
在前面的文章中, 指定了Opening操作和Closing操作。在本文中, 阐述了另一种形态学运算, 即梯度。它用于生成图像的轮廓。有两种类型的渐变, 内部和外部渐变。内部渐变增强了比背景亮的对象的内部边界和比背景暗的对象的外部边界。对于二进制图像, 内部渐变会生成前景图像对象内部边界的蒙版。
语法:cv2.morphologyEx(image, cv2.MORPH_GRADIENT, kernel)
参数:
-> image:输入Image数组。
-> cv2.MORPH_GRADIENT:应用形态梯度操作。
->kernel:结构元素。
以下是解释渐变形态操作的Python代码-
# Python programe to illustrate
# Gradient morphological operation
# on input frames

# organizing imports
import cv2
import numpy as np

# return video from the first webcam on your computer.
screenRead = cv2.VideoCapture( 0 )

# loop runs if capturing has been initialized.
while ( 1 ):
     # reads frames from a camera
     _, image = screenRead.read()

     # Converts to HSV color space, OCV reads colors as BGR
     # frame is converted to hsv
     hsv = cv2.cvtColor(image, cv2.COLOR_BGR2HSV)

     # defining the range of masking
     blue1 = np.array([ 110 , 50 , 50 ])
     blue2 = np.array([ 130 , 255 , 255 ])

     # initializing the mask to be
     # convoluted over input image
     mask = cv2.inRange(hsv, blue1, blue2)

     # passing the bitwise_and over
     # each pixel convoluted
     res = cv2.bitwise_and(image, image, mask = mask)

     # defining the kernel i.e. Structuring element
     kernel = np.ones(( 5 , 5 ), np.uint8)

     # defining the gradient function
     # over the image and structuring element
     gradient = cv2.morphologyEx(mask, cv2.MORPH_GRADIENT, kernel)

     # The mask and closing operation
     # is shown in the window
     cv2.imshow( 'Gradient' , gradient)

     # Wait for 'a' key to stop the program
     if cv2.waitKey( 1 ) & 0xFF = = ord ( 'a' ):
         break

# De-allocate any associated memory usage
cv2.destroyAllWindows()

# Close the window /Release webcam
screenRead.release()
结果如下:

输出图像帧显示了蓝皮书上生成的轮廓和左上角的蓝色对象。
首先, 你的面试准备可通过以下方式增强你的数据结构概念:Python DS课程。
 srcmini
评论前必须登录!
注册